Bitlocker

How to setup your Yubikey for use with Microsoft Bitlocker Encryption.

This tutorial requires one device of any in the following categories:

❊ Create Certificate

Create a new notepad document on your computer and name it bitlocker-certificate.txt

Open the new text file and paste the following text inside:

[Version]
Signature="$Windows NT$"

[NewRequest]
Subject = "CN=Bitlocker, OU=YourName, O=YourOrganization, C=US"
KeyLength = 2048
HashAlgorithm = Sha256
Exportable = TRUE
KeySpec = "AT_KEYEXCHANGE"
FriendlyName = "Bitlocker Encryption"
KeyUsage = "CERT_KEY_ENCIPHERMENT_KEY_USAGE"
KeyUsageProperty = "NCRYPT_ALLOW_DECRYPT_FLAG"
RequestType = Cert
SMIME = FALSE
ValidityPeriodUnits = 10
ValidityPeriod = Years

[EnhancedKeyUsageExtension]
OID=1.3.6.1.4.1.311.67.1.1 ; BitLocker Drive Encryption
OID=1.3.6.1.4.1.311.67.1.2 ; BitLocker Data Recovery Agent
OID=1.3.6.1.4.1.311.10.3.4 ; Encrypted file System
OID=1.3.6.1.4.1.311.20.2.2 ; Smart card login
OID=1.3.6.1.4.1.311.10.3.4.1 ; File recovery
OID=1.3.6.1.4.1.311.21.6 ; Key recovery agent

In the above code, you can change the text in the Subject line. You can also modify the FriendlyName, and the ValidityPeriodUnits.

By default, the certificate is set to expire in 5 years.

❊ Regedit Changes

Next, modify the registry to enable Bitlocker.

Download the above .reg file to your computer, and then double-click to execute it.

If using the source code; DO NOT modify the CertificateOID. 1.3.6.1.4.1.311.67.1.1 must match in both the registry, and in the bitlocker-certificate.txt file you created in the first step.

❊ Local Group Policy Editor

Next, open Local Group Policy Editor.

Browse to: Local Computer Policy -> Computer Configuration ->Administrative Templates -> Windows Components -> BitLocker Drive Encryption

Select Validate smart card certificate usage rule compliance

Set: Enabled

Ensure Object identifier set to 1.3.6.1.4.1.311.67.1.1

If you changed the Object Identifier (OID) number in previous steps, you must match that same OID number.

❊ Powershell

Open Powershell and change directories to the folder where you saved the bitlocker-certificate.txt file.

For my example, I used my C: drive since my file is located in C:\Bitlocker\bitlocker-certificate.txt

cd C:\Bitlocker\

After navigating to the correct folder, run the command:

certreq -new .\bitlocker-certificate.txt

Save new file as bitlocker-certificate.req

❊ Certificate Manager

Browse to: Certificates Current User -> Personal -> Certificates

Look for a certificate called Bitlocker.

Right-click on Bitlocker certificate and select All Tasks -> Export

Click Next -> select Yes, export the private key -> click Next again.

Click Next -> check Password box -> enter a password for the certificate.

Click Next -> select Browse… -> save the file as bitlocker-certificate.pfx -> click Next, and finally Finish

❊ Import Certificate

This next section will show you how to import your certificate onto your Yubikey PIV interface. The important thing to know is that your PIV interface comes with 4 main slots. Each slot has a different way of behaving which includes if you will enter a PIN or not.

You can import your Bitlocker certificate into 9A, 9D or 9E. If you do import your certificate into slot 9E and wish to require a PIN every time you unlock the drive, you will need to change the PIN / TOUCH policy.

To change the PIN / TOUCH policy, you must do it when you import your certificate / key. Once the key is on the YubiKey there is no way to change the policy. It must be done via command-line (explained below).

Choose ONE of the following two methods. Do not use both. Method 2 allows you to change the PIN / TOUCH policy on your PIV slot and can only be done with the command-line. This is only available on Yubikeys running firmware v5.4.x+

If you use the Yubikey Manager to import, the PIN / TOUCH policy will use the default settings.

Launch Yubikey Manager.

Go to: Applications -> PIV -> and select the desired slot: Authentication orCard Authentication

At the bottom right, click Import and browse to the location where you saved the bitlocker-certificate.pfx

You will be asked for your Yubikey Management Key, enter it or select Use Default if you haven't changed it.

This method enables the PIN / TOUCH policy. Requires Yubikey firmware v5.4.x+

Determine what policies work best for you. In the code examples below:

  • --pin-policy ALWAYS

  • --touch-policy ALWAYS

There are reports that specifying a different PIN POLICY will result in Bitlocker being unable to unencrypt your drive. The reason for this isn't exactly known, but if you attempt to define a PIN policy and you receive the error "No valid smartcard", please re-import the certificate without a PIN policy specified.

You can still specify the touch policy.

ykman piv keys import --touch-policy ALWAYS 9a "C:\path\to\private\bitlocker-certificate.pfx"
ykman piv certificates import 9a "C:\path\to\private\bitlocker-certificate.pfx"

❊ Validate Certificate

After the control panel opens, locate and click User Accounts.

Once the account dialog opens, on the left-side, select Manage your file encryption Certificates.

And finally, the last dialog will open and display the PIV certificate that will be used for Bitlocker.

If the wrong certificate appears, click Select Certificate button on the right and choose the correct one. Make sure you click More Choices if you have multiple PIV certificates on your Yubikey.

Once you click Next, you will be asked if you wish to backup your certificate. You can do this if you've lost your original certificate. This is just another opportunity to make sure you have a spare.

❊ Enable Bitlocker on Drive

Finally, you can now enable Bitlocker on the drive you use to encrypt.

You will be shown a list of all your drives, and the option to Turn on Bitlocker.

Once the dialog opens, select your desired options. In this example, I have selected to use both a password AND a smart card:

Finally, you will be presented with a screen to save your Recovery Key.

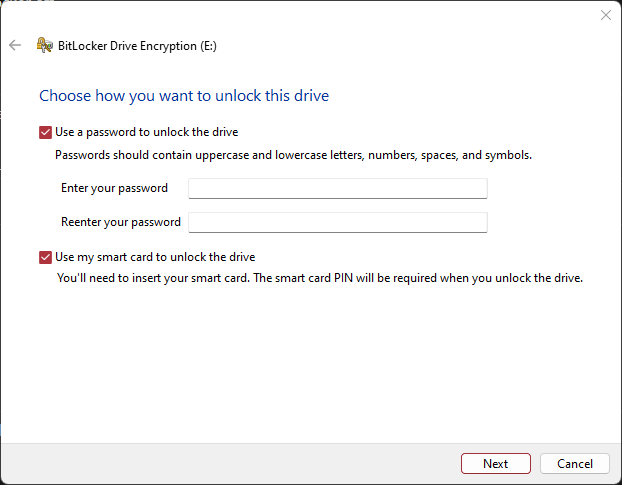
SAVE YOUR RECOVERY KEY

If you forget your password or your Yubikey no longer works, you will be unable to get into your drive without your recovery key.

❊ Existing Bitlocker Drive

Select an existing drive with Bitlocker enabled and view the options next to the drive.

Then select Add Smart Card.

Your Yubikey PIV certificate should automatically be added to your drive.

If you get a prompt that shows multiple certificates from your Yubikey, select the correct certificate.

If you have an existing Bitlocker drive which is not giving you the option to use your Yubikey, select the option Remove Smart Card, wait a few seconds, and then select Add smart card. Bitlocker sometimes glitches if you encrypt a drive and then add the smart card.

❊ Unlocking Your Bitlocker Enabled Drive

Once you have everything configured properly; it's now time to test out your drive.

Select one of your locked drives.

You will be presented with numerous ways to unlock your drive. For this example, we'll select Use Smart Card.

If you did not ever set a new PIN, then the default pin is 123456

❊ Bitlocker Toys

I have a script I use which allows me to lock my drive by simply right-clicking on the drive. If you wish to have this toy, download and install it below:

To install, unzip the contents of the zip file somewhere.

Double-click the file Bitlocker_Add_Lock_Drive_to_context_menu.reg

Copy the file lock-bde.bat to C:\Windows

If you wish to uninstall, run the file Bitlocker_Remove_Lock_Drive_from_context_menu.reg

Once installed, you can open your Windows File Explorer, right click on the bitlocker drive, and select the option available:

Last updated